
Contents
Introduction
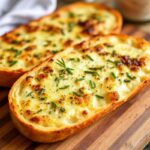
Garlic bread, a beloved staple on dinner tables worldwide, transcends mere accompaniment to become a culinary icon in its own right. With its golden-brown crust and tantalizing aroma, garlic bread captivates the senses, inviting diners to indulge in its rich, buttery flavor infused with the unmistakable essence of garlic.
This simple yet delightful dish, often served alongside pasta or soups, has roots that trace back to ancient times, evolving into various forms across different cultures. Interestingly, while garlic bread as we know it is often attributed to Italian cuisine, its origins can be linked to the broader Mediterranean diet, where garlic and bread have long held a place of prominence.
The infusion of garlic not only enhances the taste but also brings a wealth of health benefits, making it a nourishing choice in addition to being a comfort food. In this article, we share a delectable garlic bread recipe, delve into the history of this cherished dish, and celebrate the love of garlic bread that unites food enthusiasts across the globe. Whether enjoyed at a family gathering or as a comforting treat, garlic bread remains a timeless favorite that continues to win hearts and palates alike.
A Delectable Garlic Bread Recipe

Yield: 6 servings
Ingredients:
2 heads garlic, roasted and puree
1/4 lb unsalted butter, softened
2 teaspoons (2 packs) dry yeast
1/2 cup warm water (115-120 degrees)
2 1/2 cups warm water
2 tesapoons salt
3 1/4 cups whole wheat flour
3 1/4 cups all purpose flour
cornmeal
Instructions
- First, cream together the pureed garlic and butter.
- Next, combine the yeast with 1/2 cup warm water in large bowl. Stir with a fork or small whisk. Then, add an additional 2 1/2 cups water and salt.
- Stir in the flour. Add 1 cup at a time, beginning with the whole wheat.It is best to use a whisk until the dough stiffens, then you can use a wooden spoon. Turn the dough onto a well floured work surface. Knead for 10 to 15 minutes, until the dough is smooth,springy, nonsticky, and elastic. Add more flour as you knead if necessary. Note: The dough is ready if it springs back when poked with fingers.
- Cover the dough with a cloth and let rest while you wash, dry and generously butter the bowl. Knead the dough a few more turns, then form it into a ball and place it in the bowl. Turn it to coat with butter. Cover the bowl and put it in a warm, dry place until the dough has doubled in bulk, about 1 1/2 hours.
- When it has risen, gently poke a finger into the dough. If the hole remains.
- When doubled, flour your fist and punch the dough down. Knead it a few times and then let it rest. Sprinkle 1 large or 2 small baking sheets with a liberal amount of cornmeal.
- Divide the dough into 3 equal parts. While you work with 1 piece, keep the other 2 covered. Flour your work surface. With a rolling pin, roll each piece of dough into a rectangle approximately 14-inches long X 7-inches wide. Spread it with softened garlic butter. Roll the long edge toward the opposite long edge, as if you were rolling up a rug. Pinch ends closed.
- Place loaves on the baking sheets. With a sharp knife or razor blade, slash the loves lightly at 2-inch intervals. Cover with a cloth and place in a warm dry place to rise until doubled, about 1/2 hour.
- Meanwhile preheat oven to 400 degrees F.
- Bake for 35 to 40 minutes with a pan of boiling water on the oven floor. Spray loaves with water several times during the baking process. (This helps the bread form a thick crusty shell.) To test for doneness, rap the loaf with your knuckles. The loaf should sound hollow. Cool on wire racks, but the loaves are delicious eaten warm right out of the oven.
Print this recipe
Garlic Bread
Ingredients
- 2 heads garlic, roasted and puree
- ¼ pound unsalted butter, softened
- 2 tsps teaspoons (2 packs) dry yeast
- ½ cup warm water (115-120 degrees)
- 2½ cups warm water2 tesapoons salt
- 3¼ cups whole wheat flour
- 3¼ cups all purpose flour
- cornmeal
Instructions
- First, cream together the pureed garlic and butter.
- Next, combine the yeast with 1/2 cup warm water in large bowl. Stir with a fork or small whisk. Then, add an additional 2 1/2 cups water and salt.Stir in the flour. Add 1 cup at a time, beginning with the whole wheat.It is best to use a whisk until the dough stiffens, then you can use a wooden spoon. Turn the dough onto a well floured work surface. Knead for 10 to 15 minutes, until the dough is smooth,springy, nonsticky, and elastic. Add more flour as you knead if necessary.
- Note: The dough is ready if it springs back when poked with fingers. Cover the dough with a cloth and let rest while you wash, dry and generously butter the bowl.
- Knead the dough a few more turns, then form it into a ball and place it in the bowl. Turn it to coat with butter. Cover the bowl and put it in a warm, dry place until the dough has doubled in bulk, about 1 1/2 hours.When it has risen, gently poke a finger into the dough. If the hole remains.When doubled, flour your fist and punch the dough down. Knead it a few times and then let it rest. Sprinkle 1 large or 2 small baking sheets with a liberal amount of cornmeal. Divide the dough into 3 equal parts.
- While you work with 1 piece, keep the other 2 covered. Flour your work surface. With a rolling pin, roll each piece of dough into a rectangle approximately 14-inches long X 7-inches wide. Spread it with softened garlic butter. Roll the long edge toward the opposite long edge, as if you were rolling up a rug. Pinch ends closed.Place loaves on the baking sheets.
- With a sharp knife or razor blade, slash the loves lightly at 2-inch intervals. Cover with a cloth and place in a warm dry place to rise until doubled, about 1/2 hour.
- Meanwhile preheat oven to 400 degrees F. Bake for 35 to 40 minutes with a pan of boiling water on the oven floor. Spray loaves with water several times during the baking process. (This helps the bread form a thick crusty shell.)
- To test for doneness, rap the loaf with your knuckles. The loaf should sound hollow. Cool on wire racks, but the loaves are delicious eaten warm right out of the oven.
History of Garlic Bread
Garlic bread, a beloved culinary staple, has a rich history that dates back centuries. Its origins can be traced to ancient times when garlic was widely recognized for its flavor and medicinal properties. The combination of garlic and bread likely began in Mediterranean cultures, where simple ingredients were transformed into delightful dishes.
Over time, garlic bread evolved, particularly in Italy, where it became a popular accompaniment to pasta and other meals. The introduction of butter and herbs enhanced its flavor, leading to the modern version we enjoy today. By the mid-20th century, garlic bread gained immense popularity in the United States, often served in Italian-American restaurants. Today, it is cherished worldwide, celebrated for its irresistible aroma and taste, making it a favorite appetizer or side dish in various cuisines.
The Love of Garlic bread
Garlic bread is a beloved staple for many, and its popularity can be attributed to several delightful factors that make it a favorite among food lovers. First and foremost, the combination of freshly baked bread infused with rich, aromatic garlic butter creates an irresistible flavor profile that tantalizes the taste buds.

The warm, crusty exterior offers a satisfying crunch, while the soft, buttery interior provides a comforting texture that keeps people coming back for more. Garlic bread is also incredibly versatile; it pairs perfectly with a variety of dishes, from classic pasta meals to hearty soups and salads.
Additionally, its simplicity in preparation makes it an accessible choice for home cooks and a delightful addition to any dining experience. Many enjoy the communal aspect of sharing garlic bread, whether it’s served as an appetizer at a family gathering or enjoyed alongside friends during a casual dinner.
Furthermore, the unmistakable aroma of garlic wafting through the kitchen evokes feelings of warmth and nostalgia, often reminding people of cherished moments spent around the dining table. Lastly, the health benefits associated with garlic, known for its immune-boosting and anti-inflammatory properties, add another layer of appeal for those who appreciate both flavor and wellness. In essence, garlic bread is much more than just a side dish; it embodies a combination of taste, comfort, and social connection that resonates with many, solidifying its status as a beloved culinary classic.